🚀 Deploying Web Applications on Azure: A Technical Guide 🚀

I'm a senior engineer with a strong background in digital assurance and engineering services. I have extensive experience working with a variety of technologies, including VMWare, Windows, Linux, backup solutions, AWS, and Azure. I'm passionate about using my skills and knowledge to help businesses thrive in today's fast-paced, digital world. My expertise allows me to provide clients with reliable, secure, and efficient solutions that meet their unique needs. When I'm not working, you can find me exploring new hiking trails or trying out new recipes in the kitchen.
In this blog, I’ll walk you through the process of setting up an Azure environment to host a web application. We’ll cover creating virtual networks, setting up VNet peering, deploying a virtual machine, and creating a storage account. Let’s dive in!
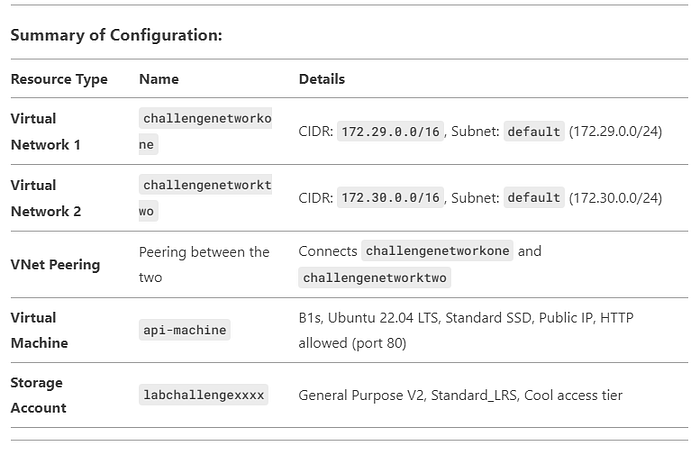
Overview of the Tasks Here’s what we’ll accomplish:
Step 1: Create the Virtual Networks
Create challengenetworkone
Go to the Azure portal and search for Virtual networks.
Click + Create.
Configure the basics:
Resource Group: challenge-rg
Name: challengenetworkone
Region: East US
Configure IP addresses:
IPv4 Address Space: 172.29.0.0/16
Subnet Name: default
Subnet Address Range: 172.29.0.0/24
Click Review + Create, then Create.
Create challengenetworktwo
Repeat the steps above with the following changes:
Name: challengenetworktwo
IPv4 Address Space: 172.30.0.0/16
Subnet Address Range: 172.30.0.0/24

Step 2: Create the Second Virtual Network (challengenetworktwo)
Create a Virtual Network:
In the search bar, type “Virtual networks” and select it.
Click “+ Create” to start creating a new virtual network.
Configure the Basics:
Subscription: Select your subscription.
Resource Group: Use the same resource group as before (e.g., challenge-rg).
Name: Enter challengenetworktwo.
Region: Select East US.
Configure IP Addresses:
IPv4 Address Space: Enter 172.30.0.0/16.
Subnet Name: Add a subnet (e.g., default).
Subnet Address Range: Enter 172.30.0.0/24.
Review and Create:
Review the settings and click “Create”.
Step 3: Set Up VNet Peering Between the Two Networks
Go to challengenetworkone:
In the Azure portal, navigate to Virtual networks.
Select challengenetworkone.
Create Peering to challengenetworktwo:
Under Settings, click Peerings.
Click “+ Add”.
Name of the peering from challengenetworkone to challengenetworktwo: Enter challengenetworkone-to-challengenetworktwo.
Virtual network: Select challengenetworktwo.
Click OK.
Go to challengenetworktwo:
Navigate to Virtual networks.
Select challengenetworktwo.
Create Peering to challengenetworkone:
Under Settings, click Peerings.
Click “+ Add”.
Name of the peering from challengenetworktwo to challengenetworkone: Enter challengenetworktwo-to-challengenetworkone.
Virtual network: Select challengenetworkone.
Click OK.

Step 4: Create the Virtual Machine (api-machine)
Create a Virtual Machine:
In the search bar, type “Virtual machines” and select it.
Click “+ Create” and select “Virtual machine”.
Configure the Basics:
Subscription: Select your subscription.
Resource Group: Use the same resource group (e.g., challenge-rg).
Virtual machine name: Enter api-machine.
Region: Select East US.
Image: Select Ubuntu Server 22.04 LTS by Canonical.
Size: Select B1s.
Administrator Account:
Authentication type: Select SSH public key.
Username: Enter azureuser.
SSH public key source: Generate a new key pair or use an existing one.
Networking:
Virtual network: Select challengenetworkone.
Subnet: Select default.
Public IP: Ensure a new public IP is created (e.g., api-machine-public-ip).
NIC network security group: Select Advanced and create a new NSG (e.g., api-machine-nsg).
Add inbound rule: Allow HTTP traffic (port 80).
Disks:
OS disk type: Select Standard SSD.
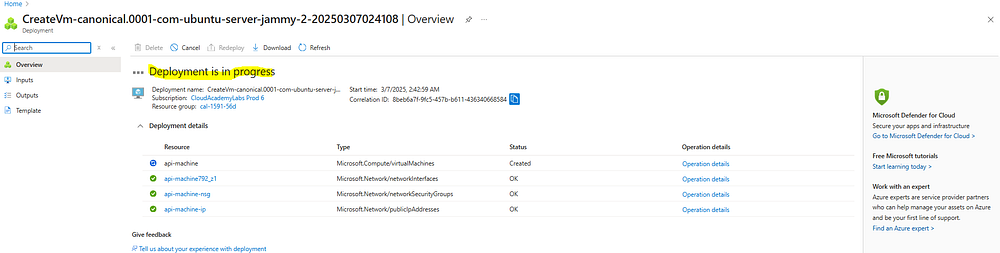
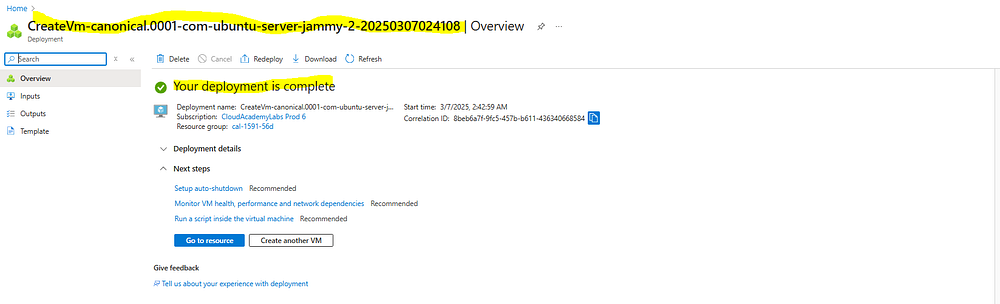
Review and Create:
Review the settings and click “Create”.
Step 5: Create the Storage Account (labchallengexxxx)
Create a Storage Account:
In the search bar, type “Storage accounts” and select it.
Click “+ Create”.
Configure the Basics:
Subscription: Select your subscription.
Resource Group: Use the same resource group (e.g., challenge-rg).
Storage account name: Enter labchallengexxxx (replace xxxx with random numbers, e.g., labchallenge1234).
Region: Select East US.
Performance: Select Standard.
Redundancy: Select Locally-redundant storage (LRS).
Advanced:
Access tier: Select Cool.
Review and Create:
Review the settings and click “Create”.
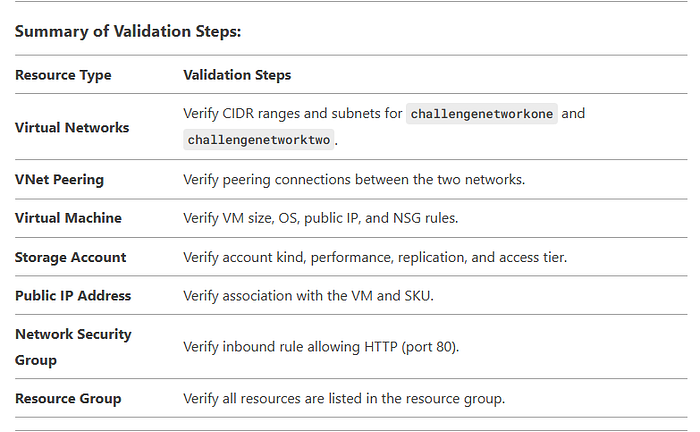
Step 6: Verify All Resources Virtual Networks:
Go to Virtual networks and verify challengenetworkone and challengenetworktwo exist with the correct CIDR ranges.
VNet Peering:
Go to Virtual networks > Peerings and verify the peering connections between the two networks.
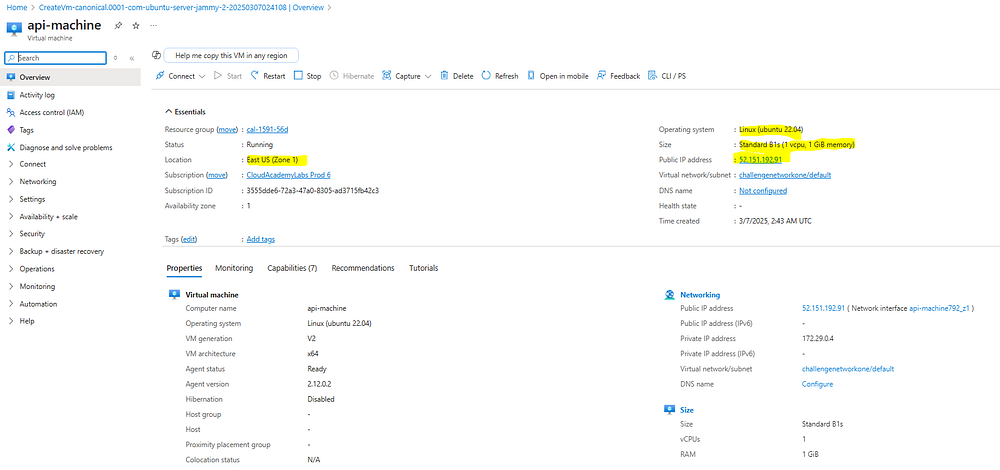
Virtual Machine:
Go to Virtual machines and verify api-machine is running and has a public IP address.
Check the NSG rules to ensure HTTP traffic (port 80) is allowed.
Storage Account:
Go to Storage accounts and verify labchallengexxxx exists and is a General Purpose V2 account.

Conclusion :-
By following these steps, you’ve successfully set up an Azure environment for hosting a web application. This includes creating virtual networks, setting up VNet peering, deploying a virtual machine, and creating a storage account.
Feel free to reach out if you have any questions or need further assistance. Happy cloud computing! 🚀


